Sleeping - the other half of camping
2018-08-30
PA
I mentioned previously that the things which make camping different than just a normal vacation are eating and sleeping. Once you're fed and ready to hit the sack, you need to have a place to do it. In reality this is the easier of the two problems; essentially buy what you need and surround yourself with it. I have a tent, air mattress, and a sleeping quilt (which is the top half of the sleeping bag since the bottom half doesn't really do anything when compressed).
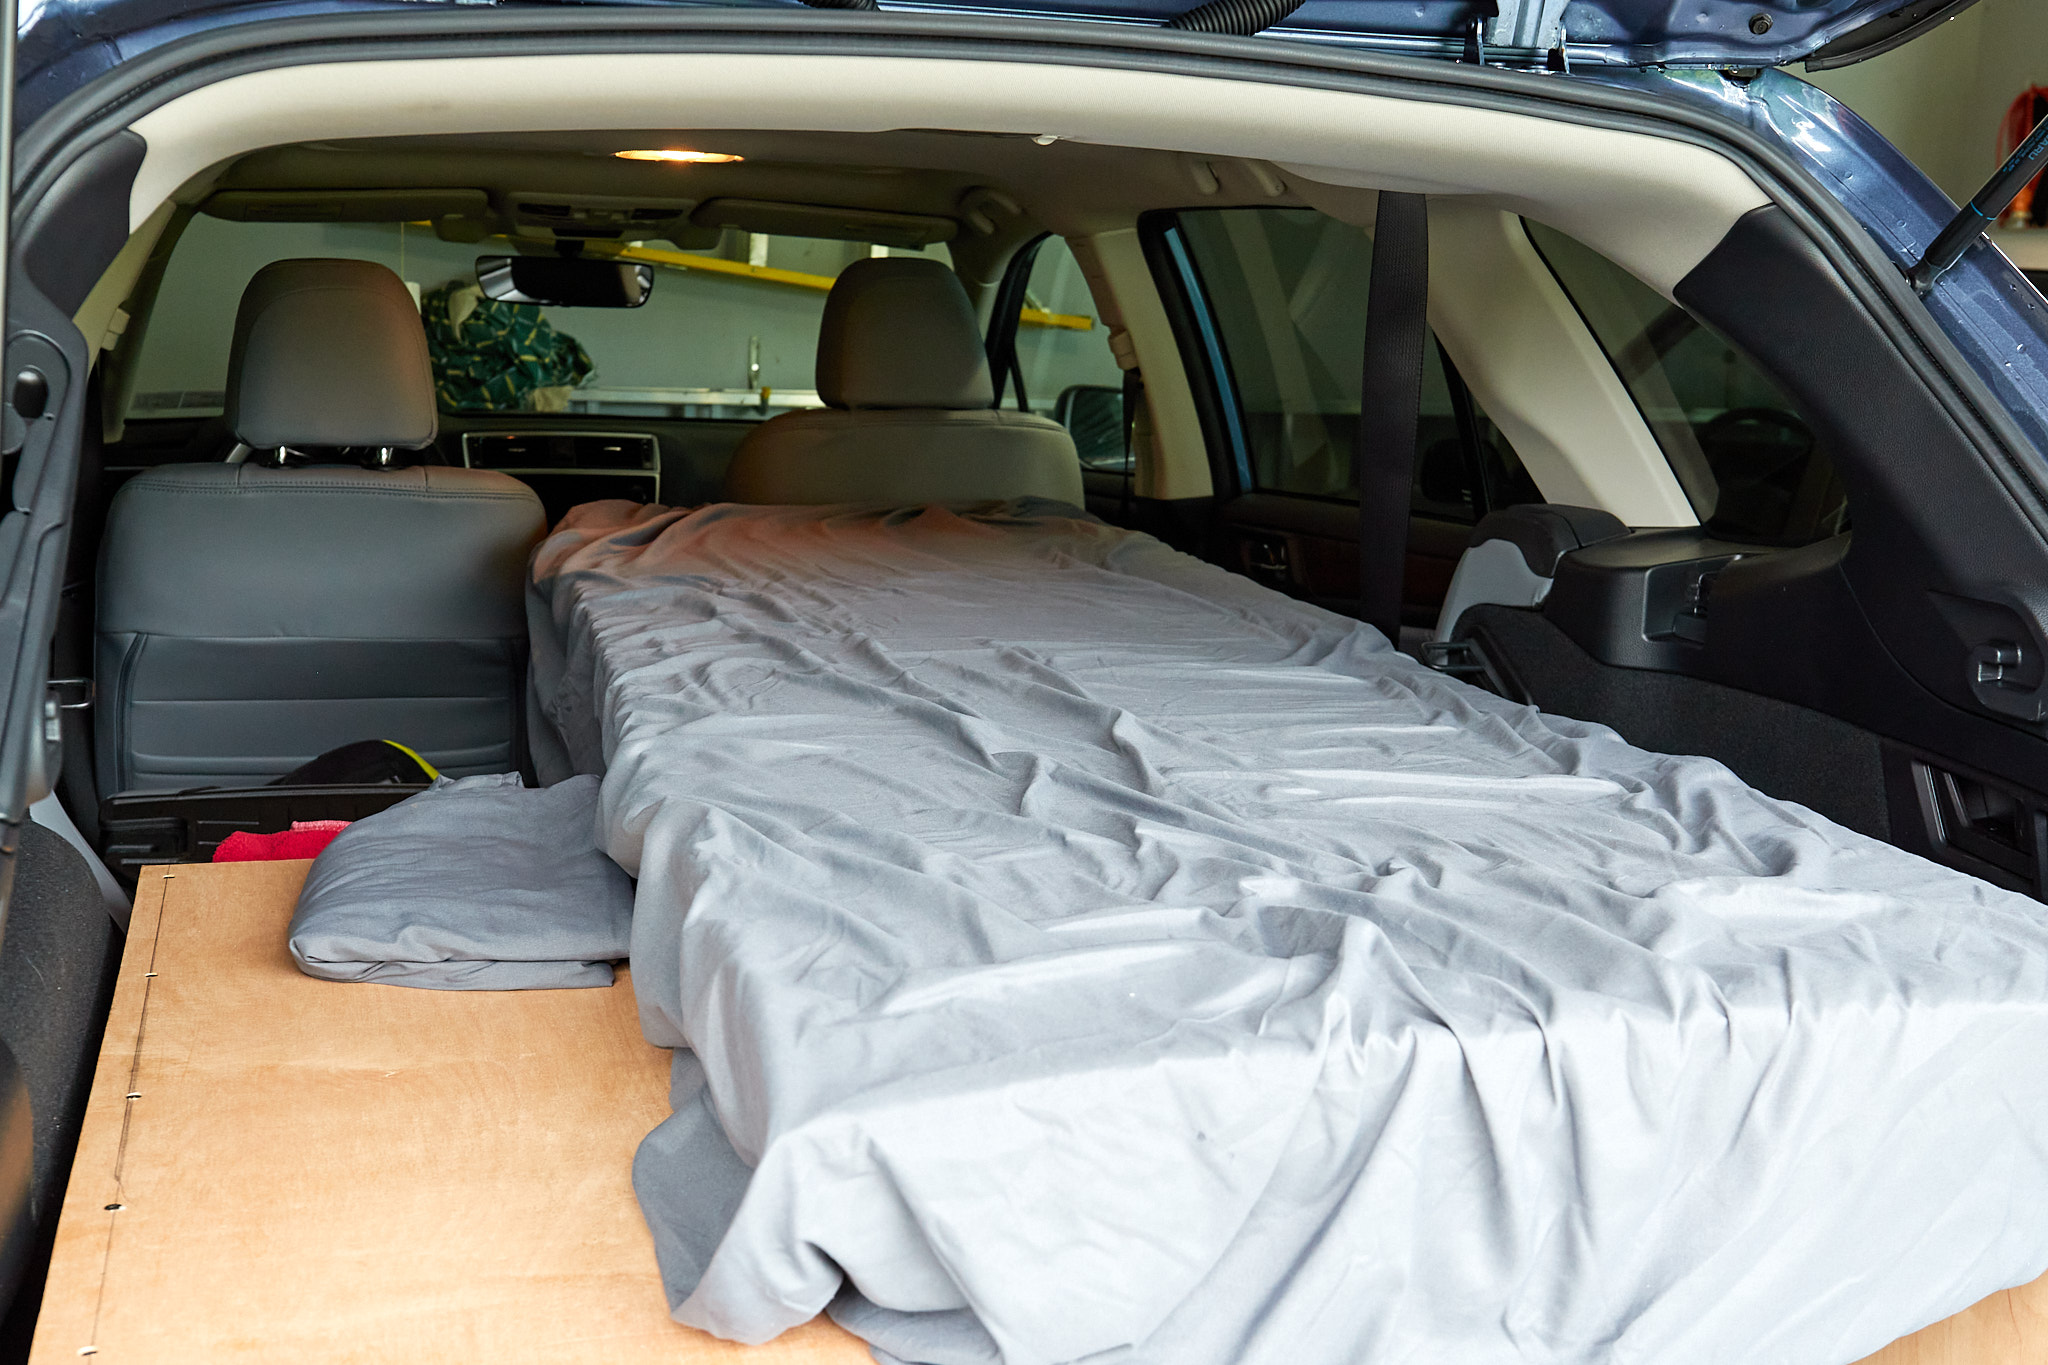
However, to add some flexibility I wanted to be able to sleep in the back of my car (Subaru Outback) as well. I see this being useful in a couple different ways. First, if it's raining I will probably not want to haul out a bunch of stuff and set it up in the rain. It will be easier and overall a bit drier to just climb in the back, although I'm not flexible enough to crawl between the seats or anything so I'll still be "roughing it" by getting at least a bit wet. Second, I may need to stealth camp along the way. You can camp in national forests or even at Walmart's, but in either case I may prefer to have a locked cage around me. Also putting tent stakes into asphalt seems like it might be time consuming.
There was the hidden third reason too: I like DIY projects and it sounded like fun. So off to Lowe's to pick up sheets of 3/4 and 1/2 inch plywood. Note that I didn't mention new saw blades; a bit of a mistake rectified later as the current blades were survivors from the laminate flooring project. The biggest selling feature of laminate flooring is how durable it is, so it's no surprise that if the room is big enough the resulting saw blade will be perfect for slicing a stick of butter, assuming it's not too cold. If you're trying this at home, swing by the saw blades on your way to lumber.
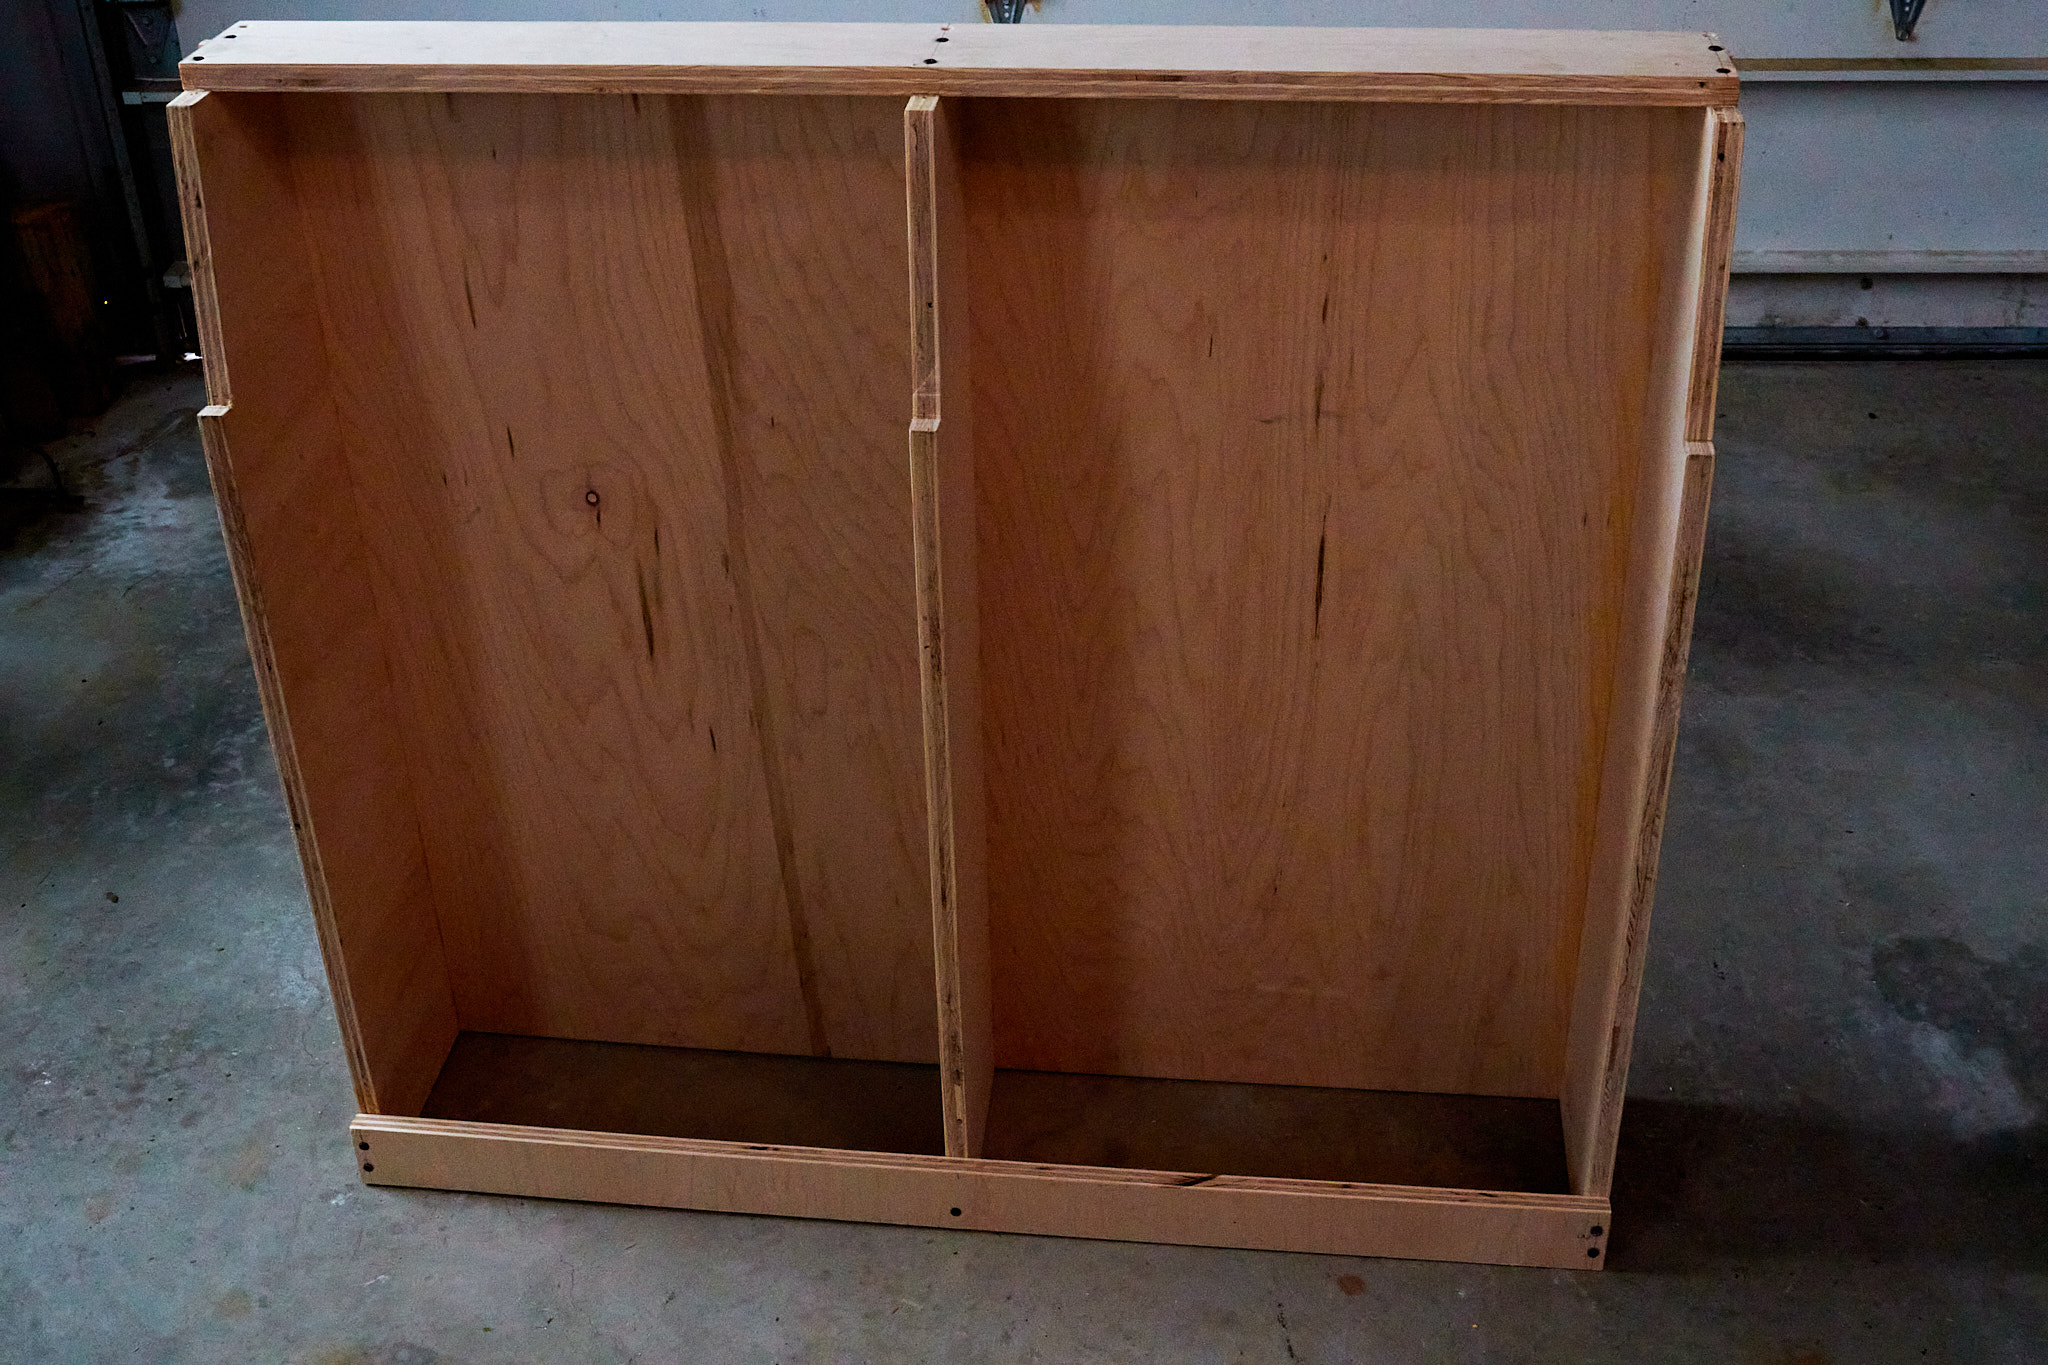
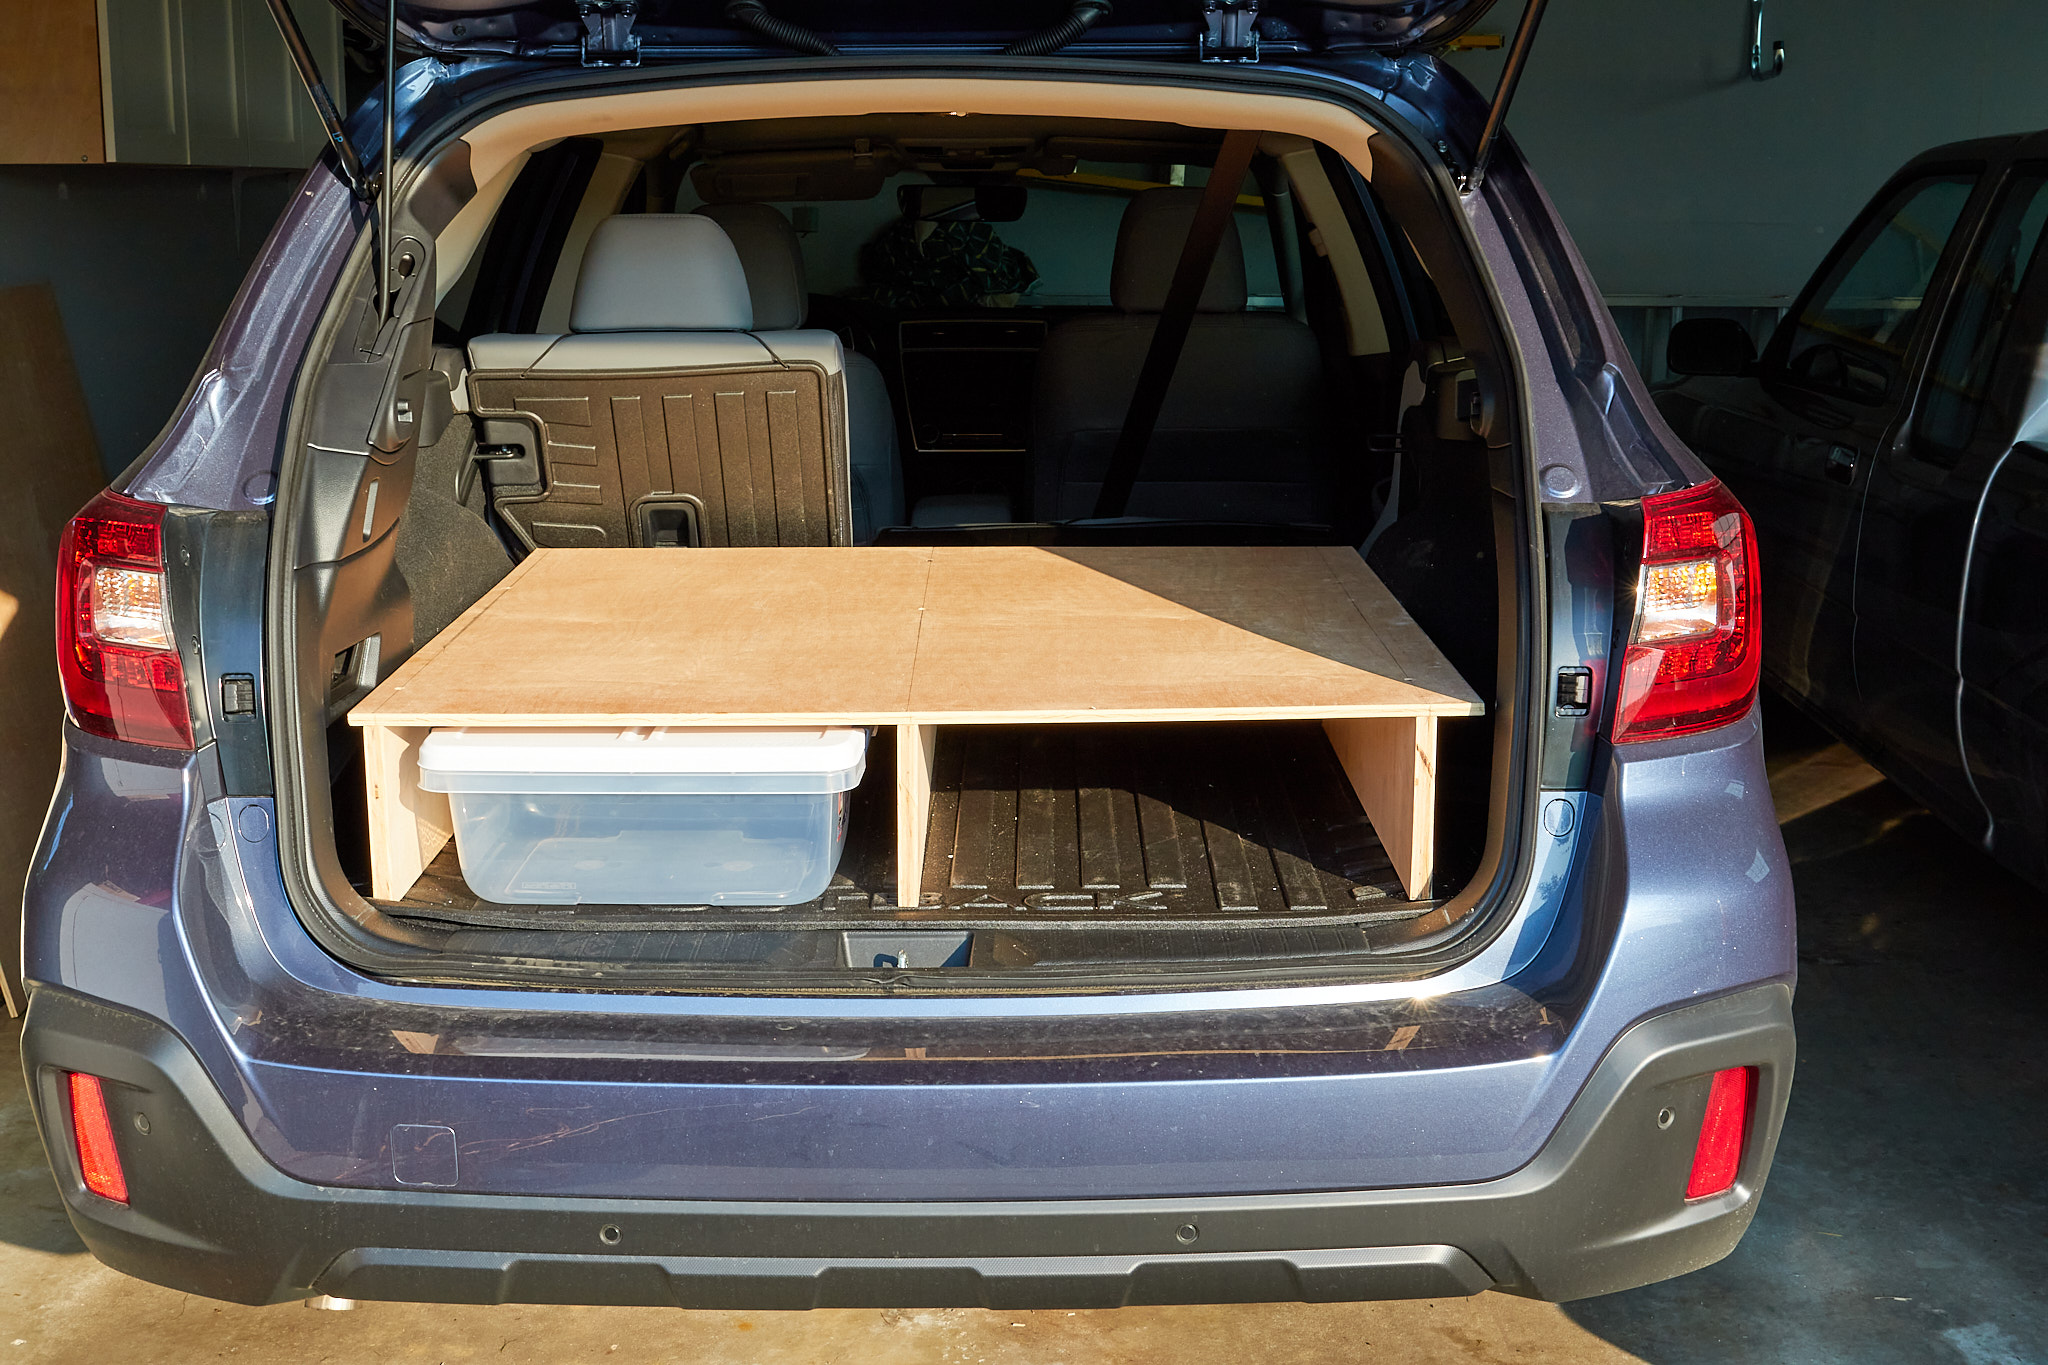
I wanted the part of the platform to be detachable so that I can put the back seats up if anyone joins me for part of the trip, so I decided to do the back half in the cargo area and then a separate front half over the seats. It seemed simple enough. I even picked up some bins so I'd know how tall to make it. However when I cut the verticals I soon found out that the rear floor is not flat; about 8 inches from the front it starts sloping upwards. And that's the story of why the rear box is notched.
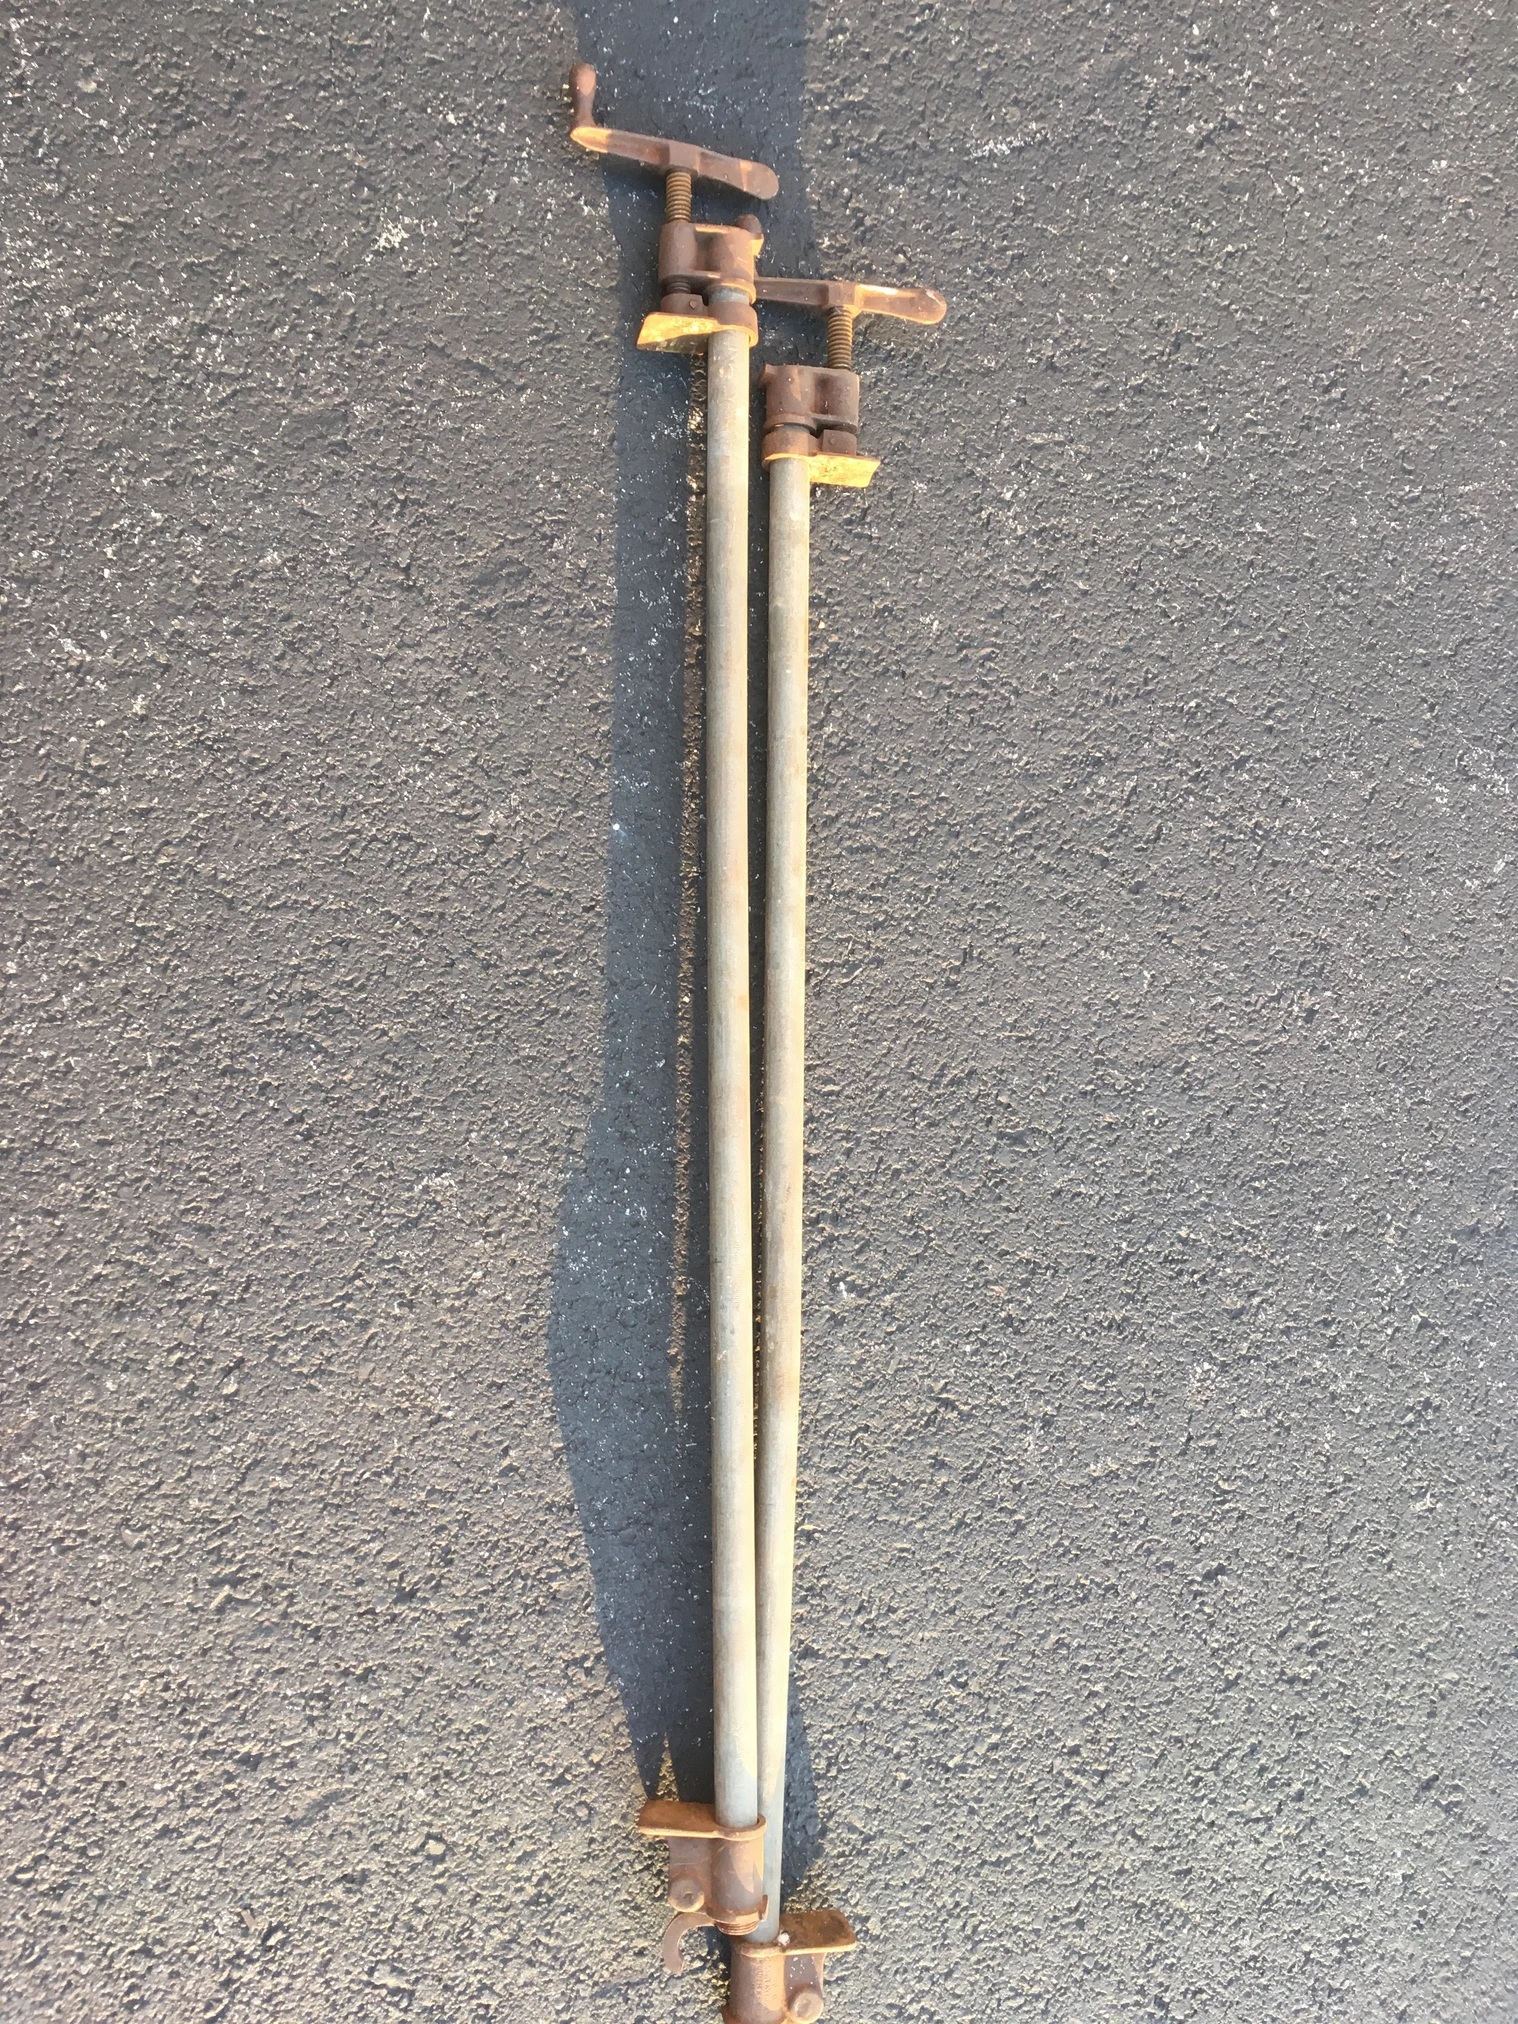
One cool thing is that I got to break out my Granddad's pipe clamps. They're older than me and I haven't used them since I moved to PA. I don't know how much clamp technology has changed, but these worked great and it was cool to reminisce.
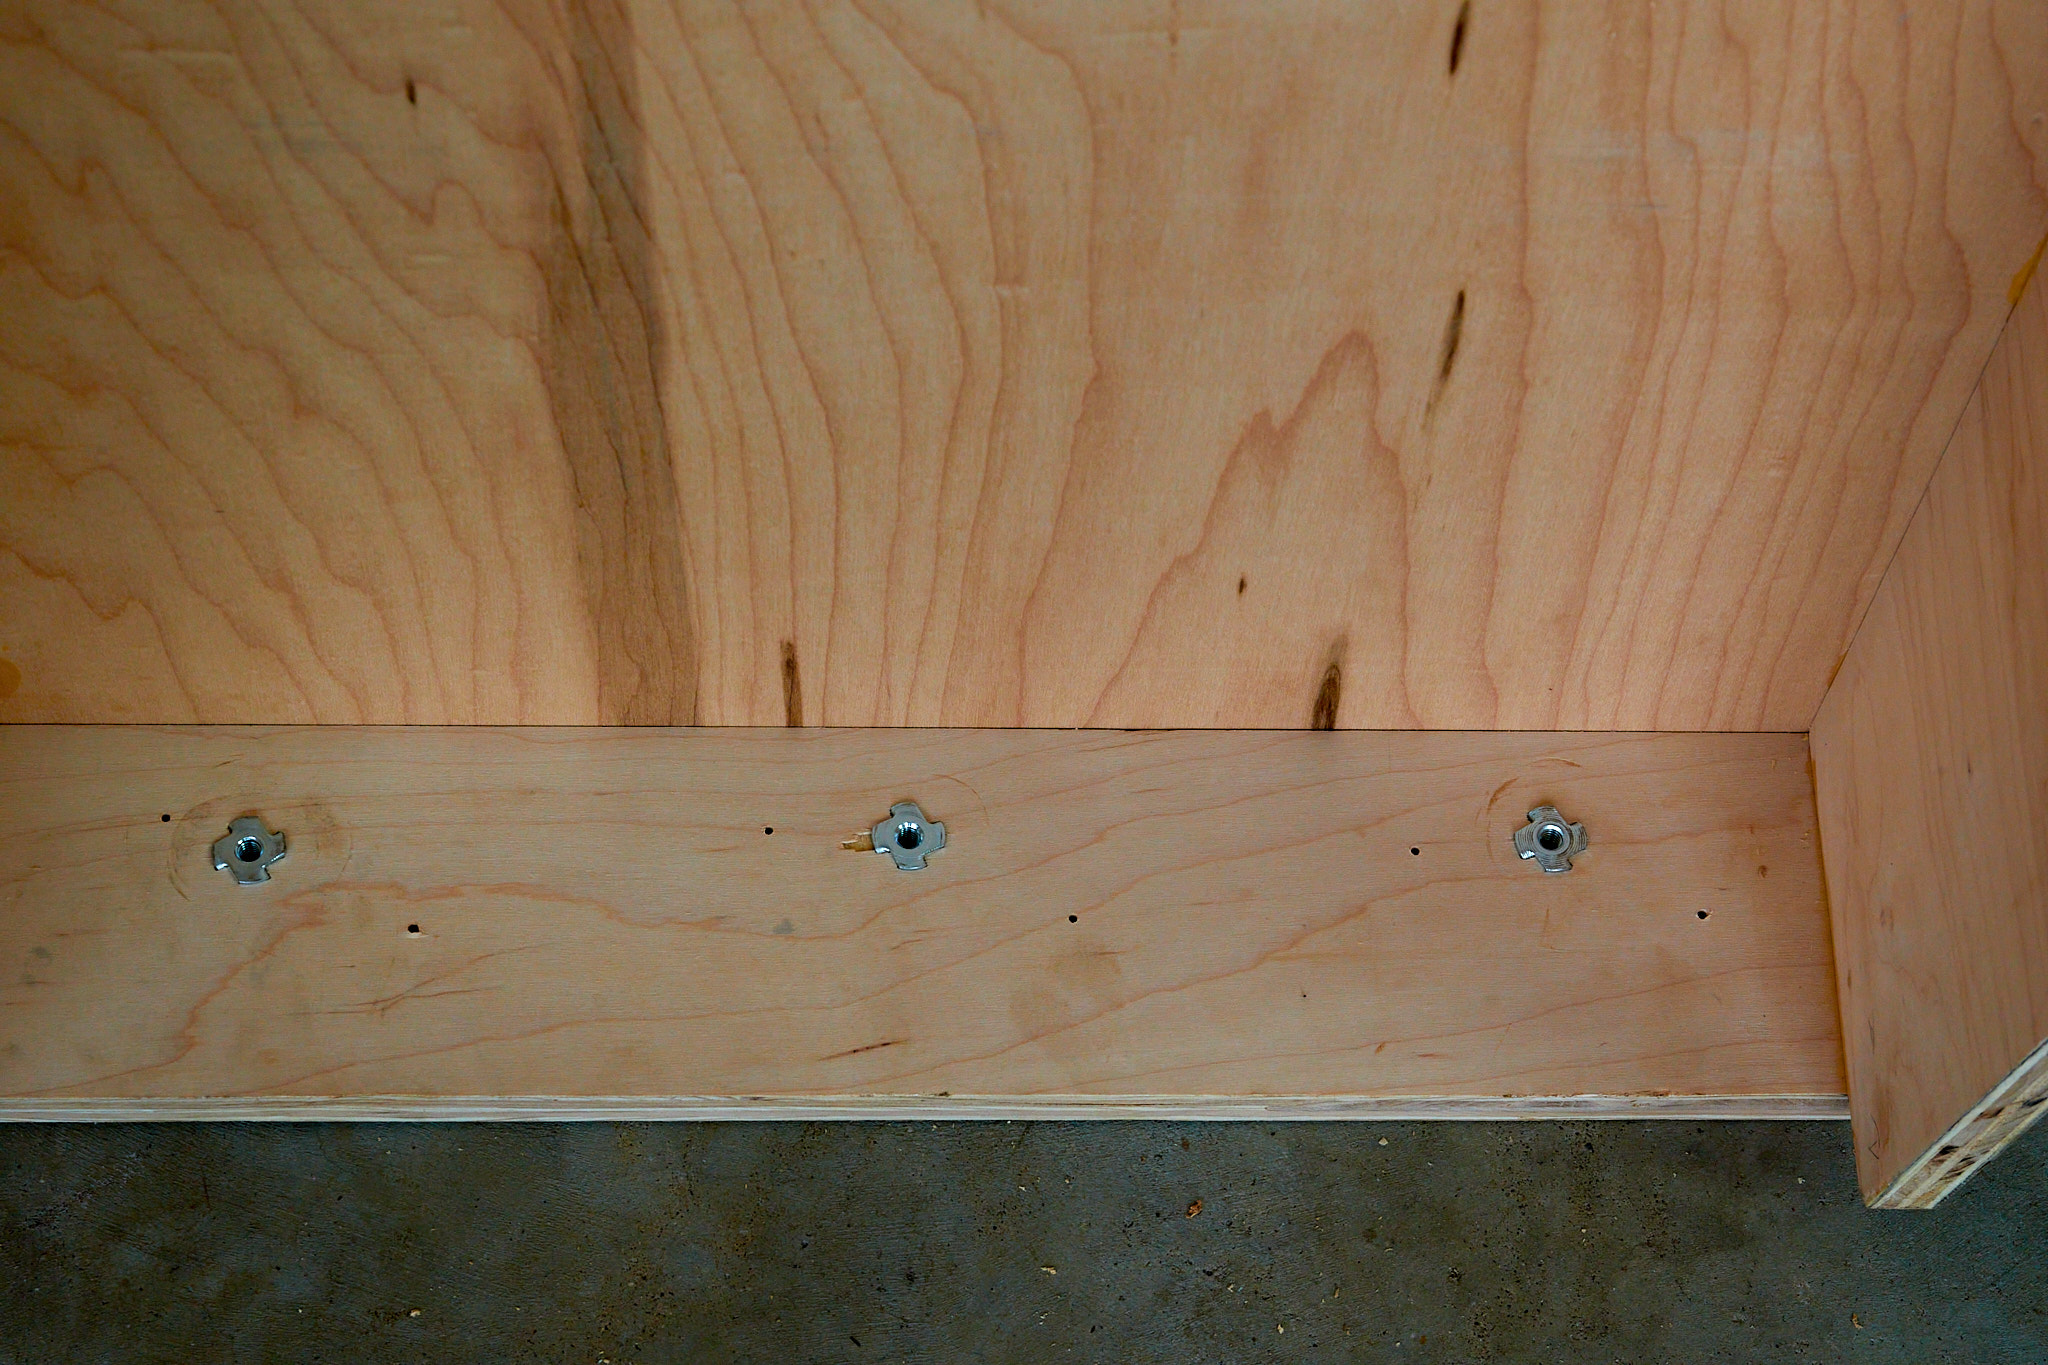
Once the back end was assembled and glued I built the front half. The original plan had it resting on the folded seat but that turned out to be a bit squishy so I opted for 2x3 legs dropping to the floor at the front of the seat. Also I decided to make it the width of just one folded seat (the larger one) so it's right at 24 inches wide which is also the width of my air mattress. I used the rest of that 2x3 across the width of the forward platform at the front and back as a bolting connections. To connect the sections I used three 1/4 inch bolts into tee nuts on the rear platform. I had gotten advice to not only to use these nuts in the blind area, but also to epoxy them in so they couldn't back out. Both ideas are very sensible but of course I forgot to buy epoxy so I took a scrap piece of plywood and drilled it and screwed it over top of the tee nuts while the rear platform was out. That worked great. For the front it's just straight through nuts and bolts to the leg assembly. None of these bolts should actually be carrying any load; the platform is resting directly on the rear platform and the front legs. However I went with 1/4 inch bolts because they are large enough to deal with easily.
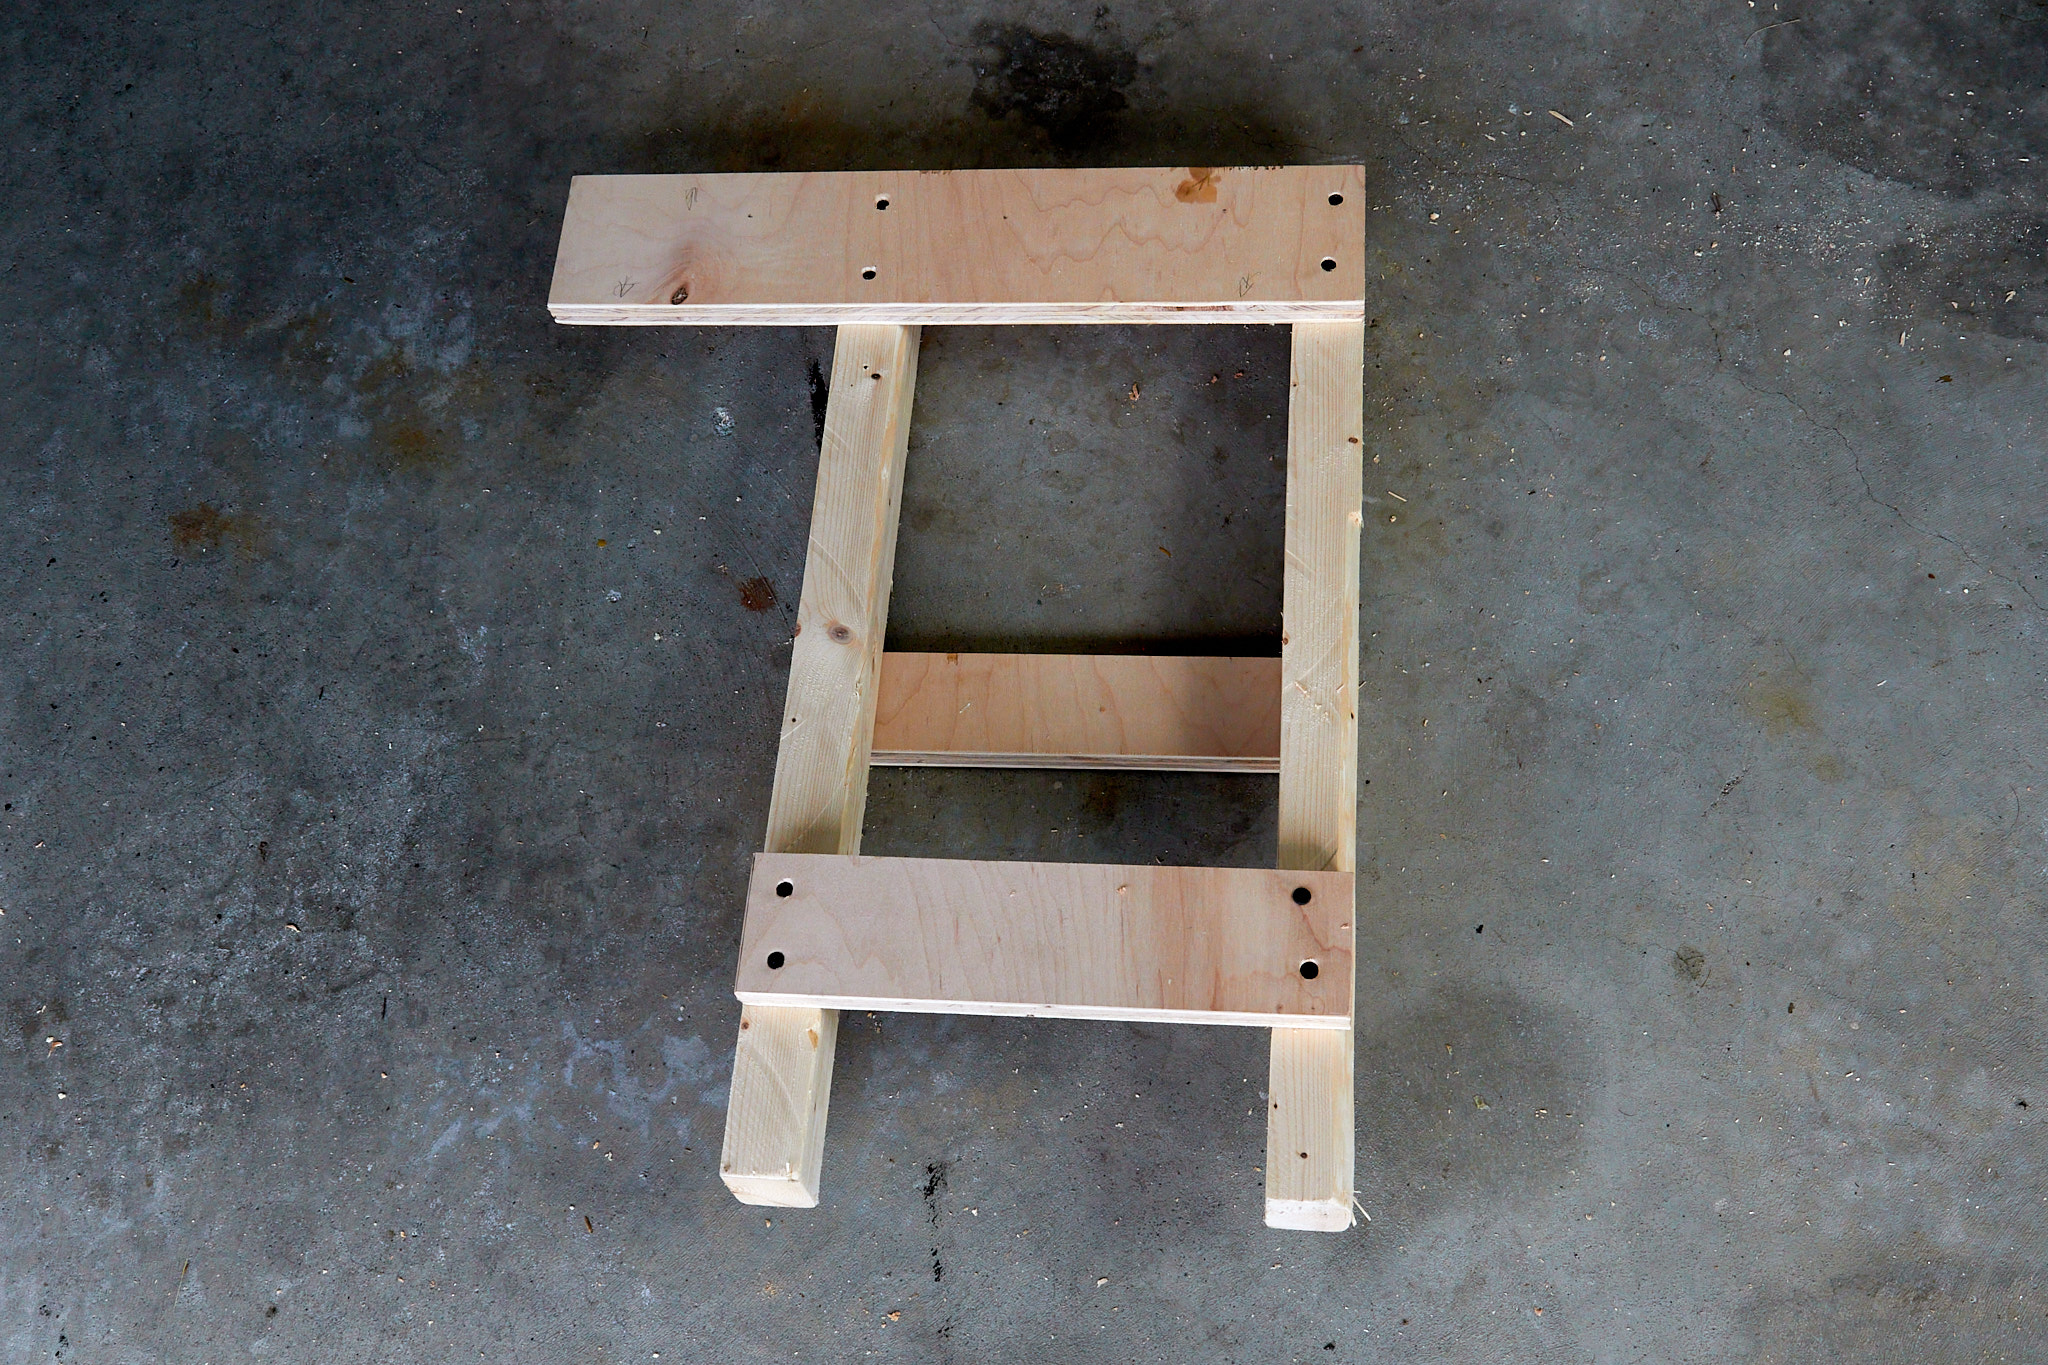
A quick learning experience happened here. Once everything was bolted together I realized that the 1/2 inch plywood wasn't sturdy enough for the redesigned platform with a nearly three foot span front-to-back. (You'll recall the original plan had it spanning much shorter distances to rest on the top of the seat.) Luckily I had plenty of strips of 3/4 plywood so I glued and screwed three strips on the bottom making it plenty study.
The platform is just under six feet long, and the mattress is 6' 6" so I have to slide the front seat up a bit further to accommodate it. Luckily I'm closer to 5'9" so it's not a problem to be missing a couple inches of support. And with the mattress rolled up the front seat passenger has plenty of room without hitting the platform.